The easiest point from which to start is the private area view of the document you intend to translate.
For example, you may be sent a URL like this, with a request to translate an article:
(this is the English version of the article, but if you prefer, you may just as easily translate from the French version).
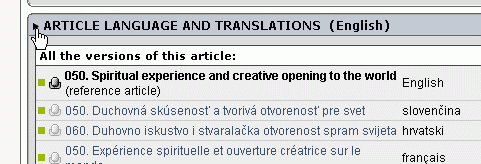
1. Go to the article and start by clicking the small triangle here

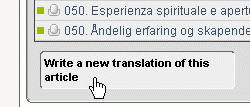
2. Then click the button which appears, saying “Write a new translation...”

3. The programme then creates a new page, and copies the contents of all the fields of the original article into the new one. You can see that it is a new article, because the prefix New translation: has been added to the title.

Take away the words New translation, but leave the number, followed by a dot and a space at the beginning of the title. This number is not visible on the public website. It determines the order in which the articles are listed in the menus in the left-hand column on the site.
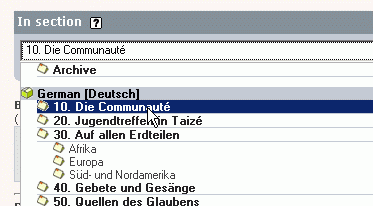
4. Before you do anything else — because it is easily forgotten — it is a good idea to set the section in which your new article will be published. Use this scrolling list to do this

You need to select not only the correct language, but also the correct section (and maybe subsection) for your translated article. So if we were translating into German, our example article would go here

5. ![]() Please do not place any text in the Reserved for special use box: it is for technical use only.
Please do not place any text in the Reserved for special use box: it is for technical use only.![]() See the separate article on titles and subtitles to learn about the different Title boxes.
See the separate article on titles and subtitles to learn about the different Title boxes.![]() Text placed in the Deck will be shown in bolded red text as an introduction to the main article.
Text placed in the Deck will be shown in bolded red text as an introduction to the main article.![]() Text placed in the Postscript is displayed in a box in the right-hand column of the page — so this text should not be too long.
Text placed in the Postscript is displayed in a box in the right-hand column of the page — so this text should not be too long.
6. It is possible to translate directly in the boxes on the website [1]. Usually however, especially if the article is long, it is easier to prepare your translation beforehand in your word-processor, and then cut and paste into the boxes.
Tip: If you want to print out the original document in order to translate it, then do so from the public side of the website, using the Printable version link.
7. Before you delete all the original text in the boxes to make way for your translation, check it through to notice any formatting, links and emails, and photos which have been included.
Something like this <emb855|left> is a photo or graphic. You should not delete it. Place your text around it in the same way as the text of the original article. Please leave an empty line above and another one underneath this photo inclusion.
8. See the following pages for:![]() making new lines and paragraphs
making new lines and paragraphs![]() titles and subtitles
titles and subtitles![]() links
links![]() email addresses
email addresses
9. To see about placing text in italics or bold and making footnotes [2], see the programme’s online help (2nd button fron the right at the top of the screen). The section Articles / Typographical shortcuts is the most useful page to read.
10. When your translation is ready and you have clicked the Submit button at the bottom right of the page, then, according to the system which has been established for your language or section, either
![]() click the button at the bottom of the article
click the button at the bottom of the article

which will send a notification to the brother who looks after that part of the website; or
![]() change the status of the article to “published online” [3]; first change the drop-down list Article status, then click the Modify button which appears to the right of it.
change the status of the article to “published online” [3]; first change the drop-down list Article status, then click the Modify button which appears to the right of it.

